

コンテナ環境を利用するために、CentOS7上にDocker環境を構築してみました。Dockerを利用することで検証に利用するWebサーバなどを簡単に構築することができます。また、環境をコード化することが出来ますので、同じ環境を様々な場所で容易に再現できるようになります。
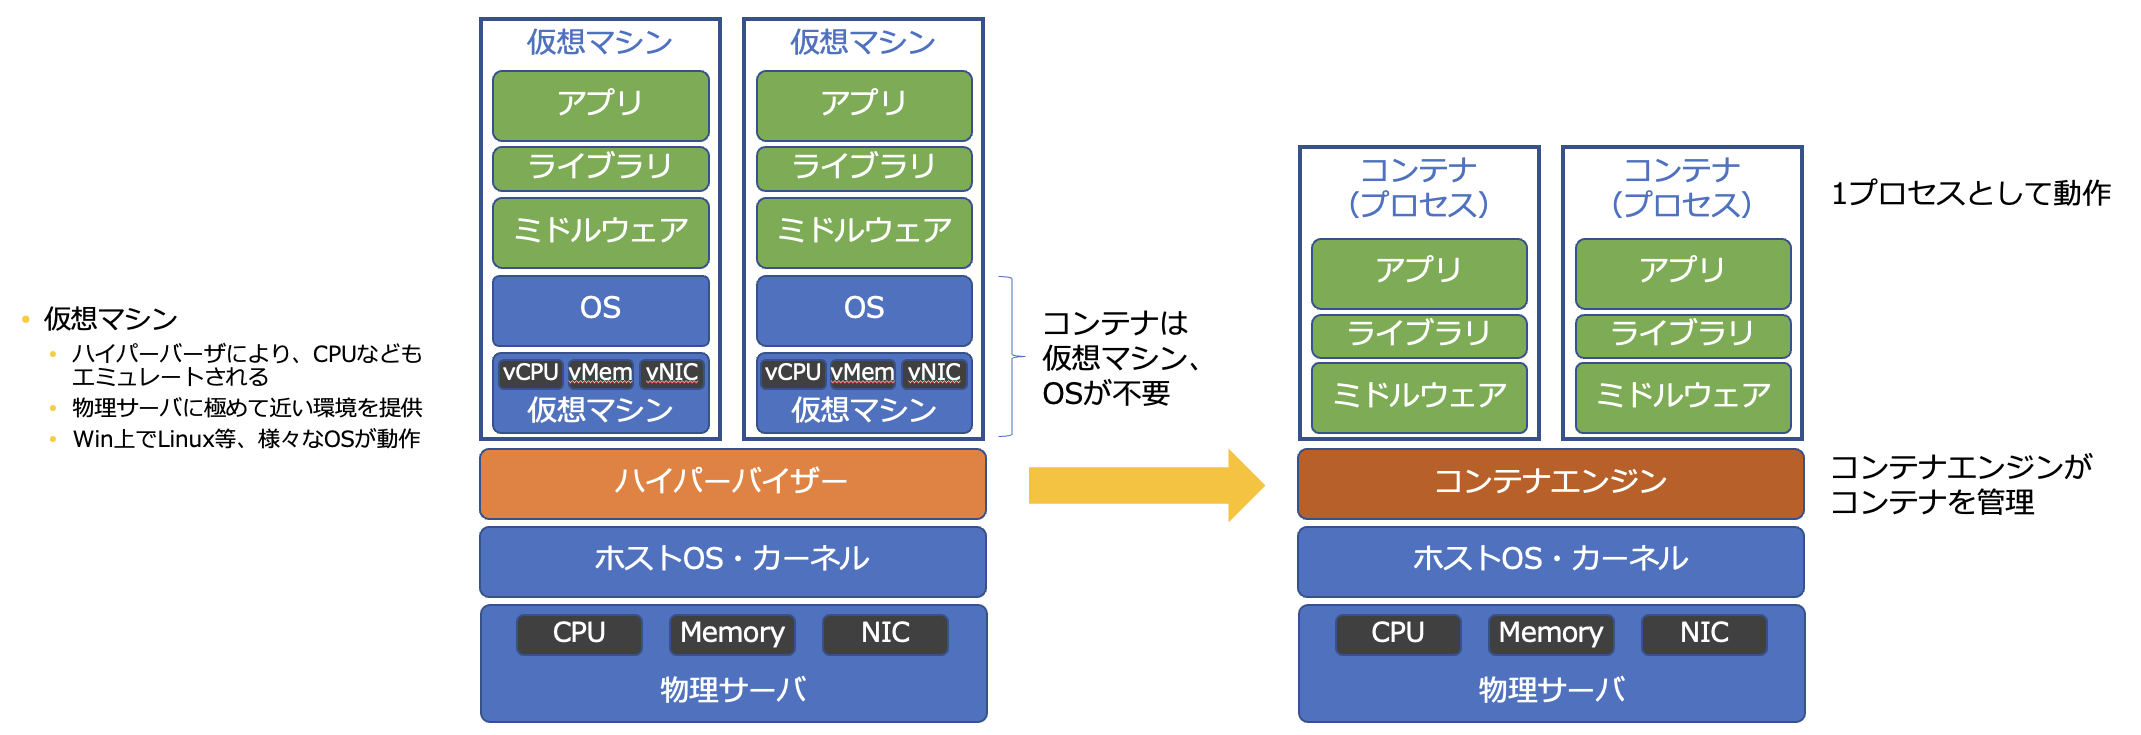
コンテナとは?
コンテナに関する情報は巷に溢れていますので適宜ググっていただければと思いますが、従来の仮想マシンとの違いは概ね以下のようなものです。
- コンテナはハイパーバイザーの代わりにコンテナエンジンを利用して仮想化を行います。
- ハイパーバイザー上の仮想マシンおよび仮想OSのオーバーヘッドがないので、ハイパーバイザーを利用したVMに比べて軽量です。
- コンテナは、はホストOSのカーネルに依存して動作します。
- 従来の仮想マシンのように仮想OSを別途準備する必要はありません。
- ホストOSのカーネル上で動作しますので、カーネルの異なるOS間の互換性は基本的にありません。
→ VMのようにLinux上でWindowsアプリを動かすといったことは基本的にできません。 - 各コンテナはホストOS上の1プロセスとして動作します。
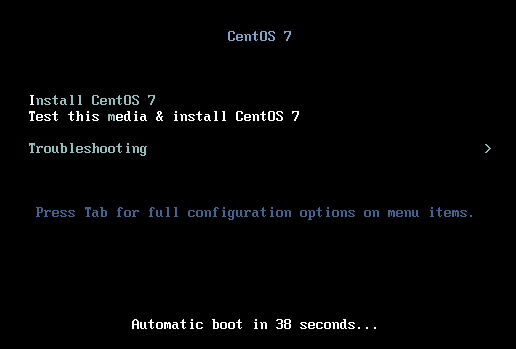
CentOSのインストール
まず、CentOSのインストールを行います。セキュリティ等のことは一歳考慮せず、最低限の設定で構築しています。また、基本的にrootでログインして作業を行なっています。
- Install CentOS 7を選択します。
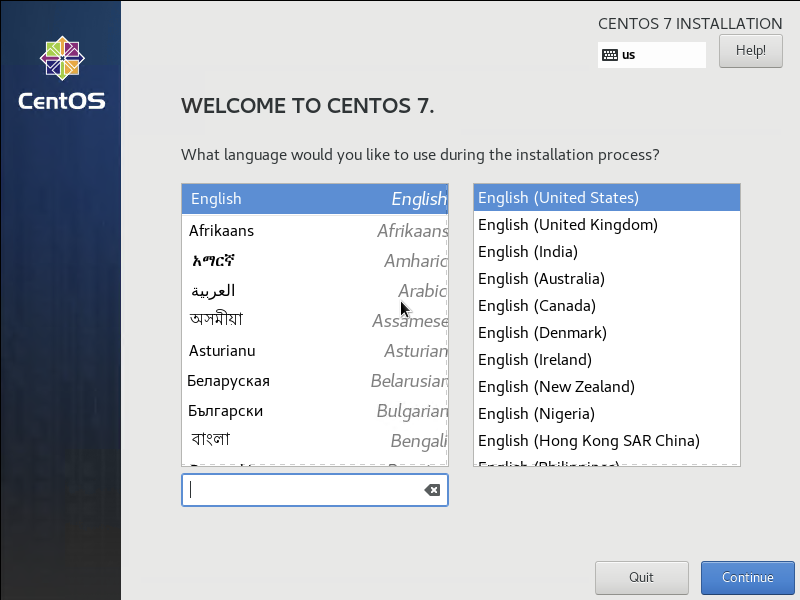
- 言語を選択します。(Englishを選択していますがお好みで)
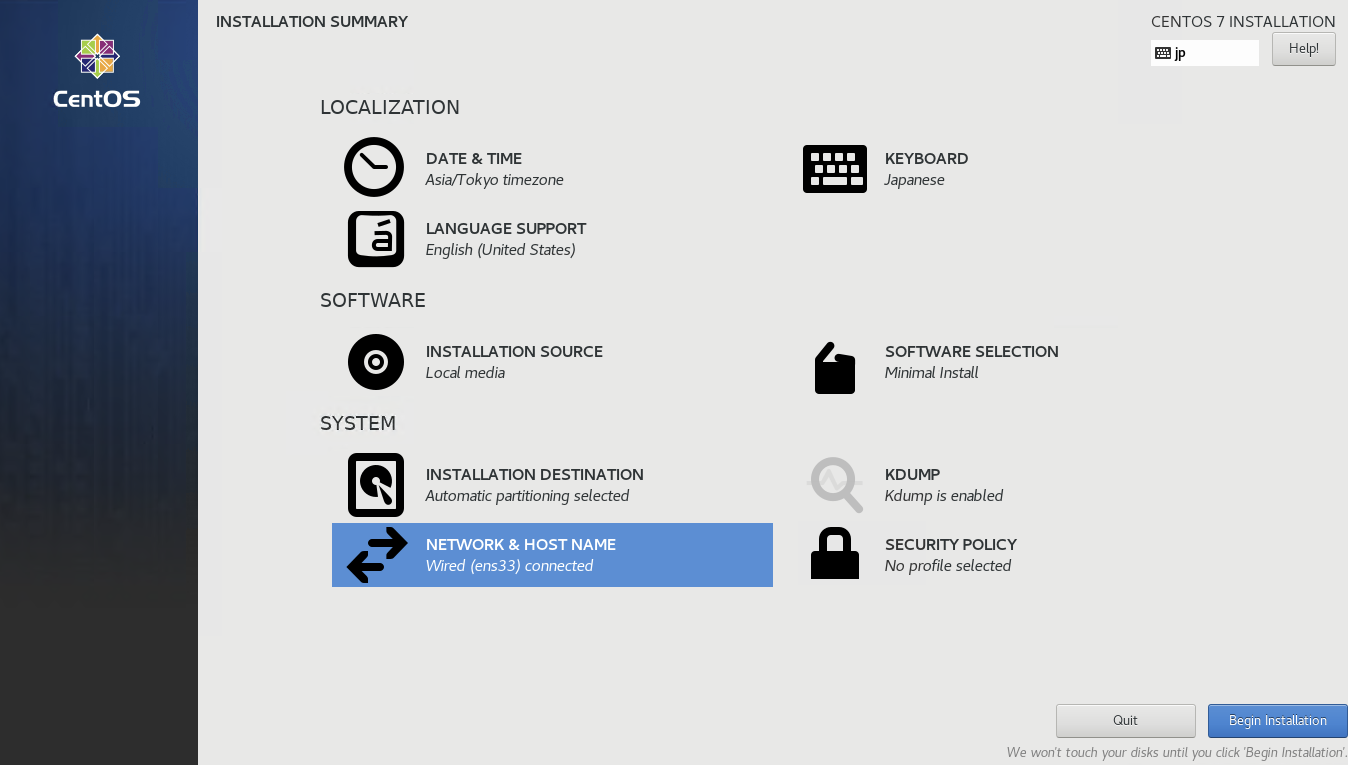
- INSTALLATION SUMMARYが表示されるので以下の設定を行います。
今回は、最低限の機能が入ったMinimal Install(デフォルト)を利用しますので、SOFTWARE SELECTIONは触りません。
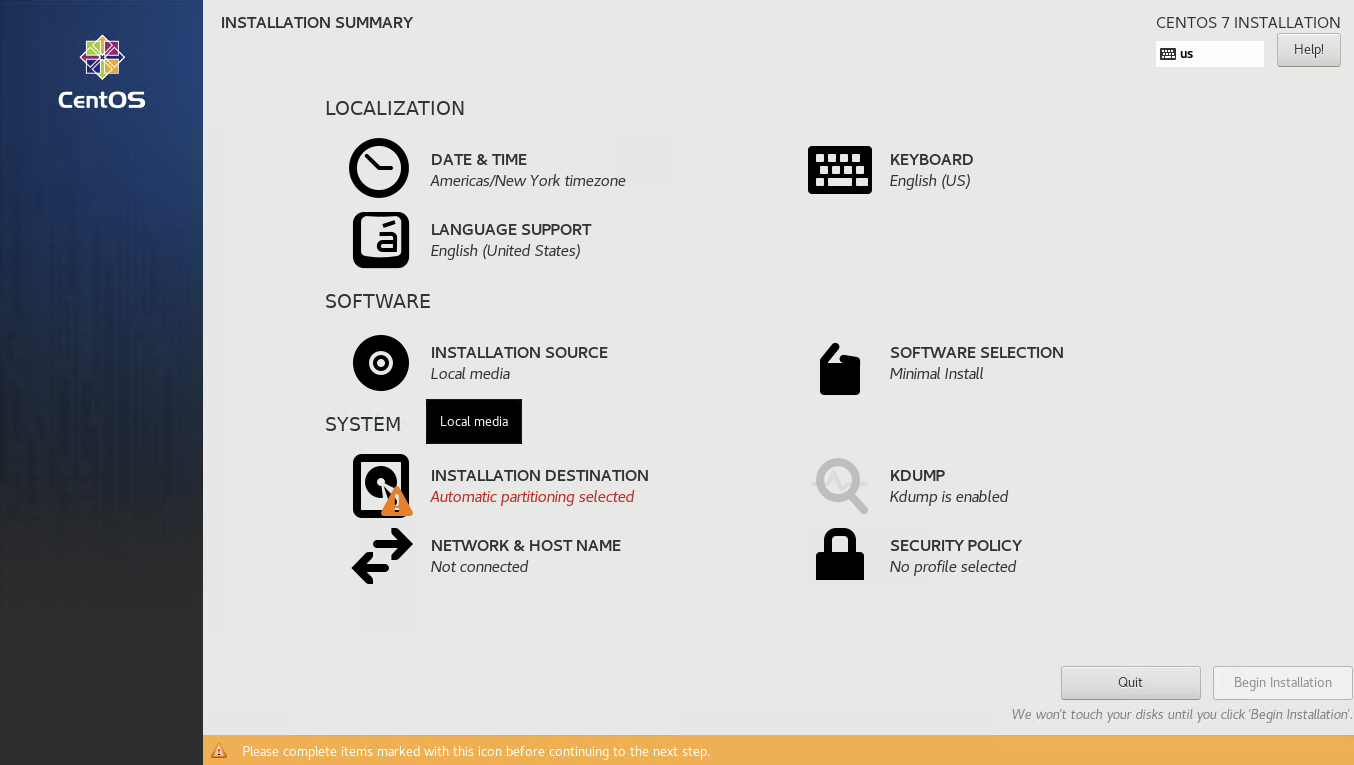
- DATE & TIME
Asia/Tokyoに変更

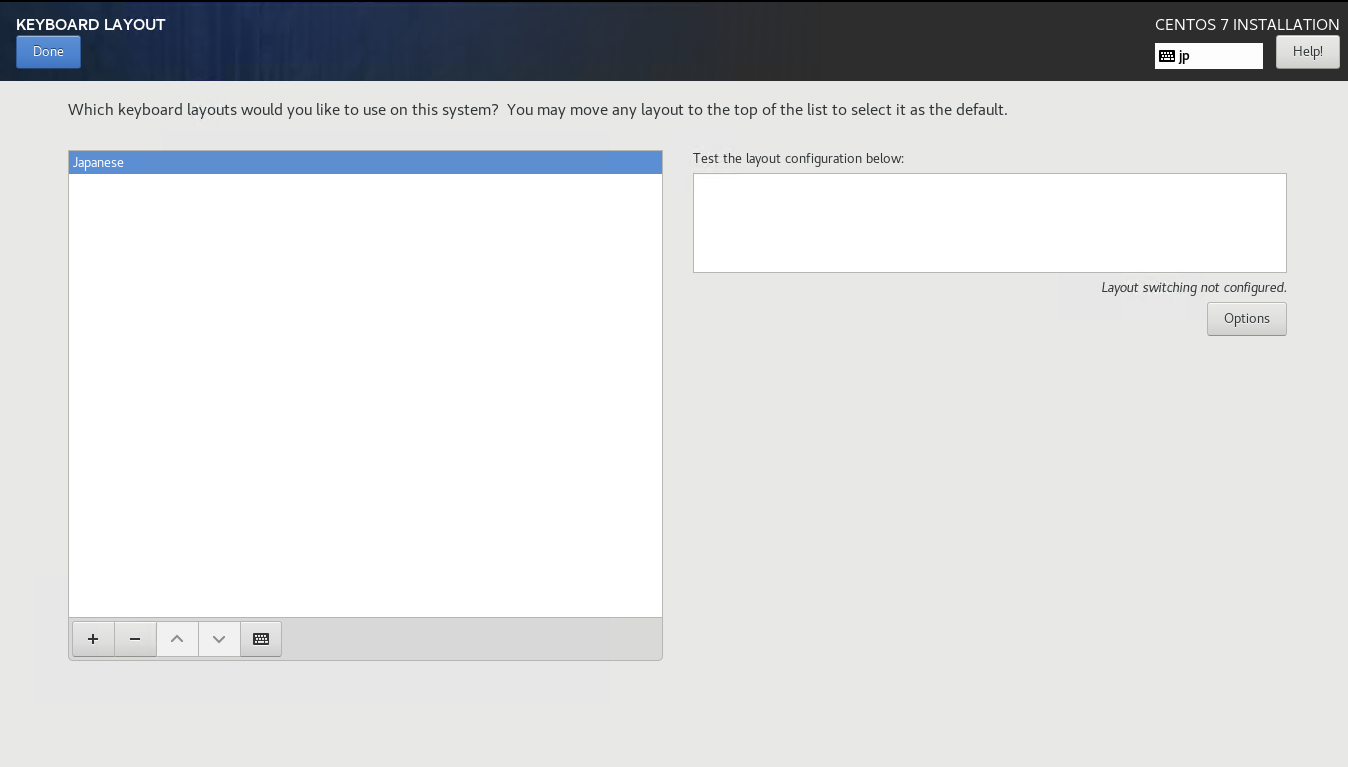
- KEYBOAD
Englishを削除して、Japaneseを追加します。
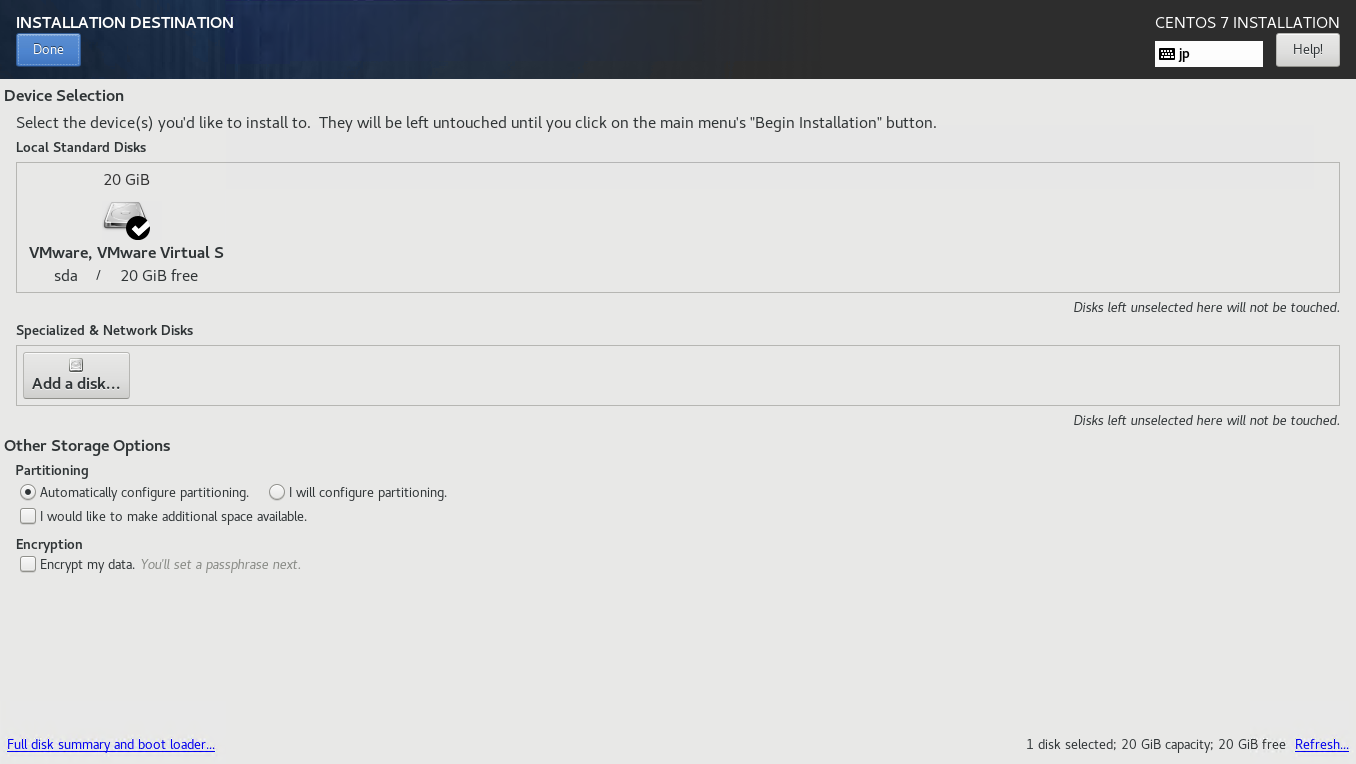
- INSTALLATION DESTINATION
インストールするディスクを選択します。
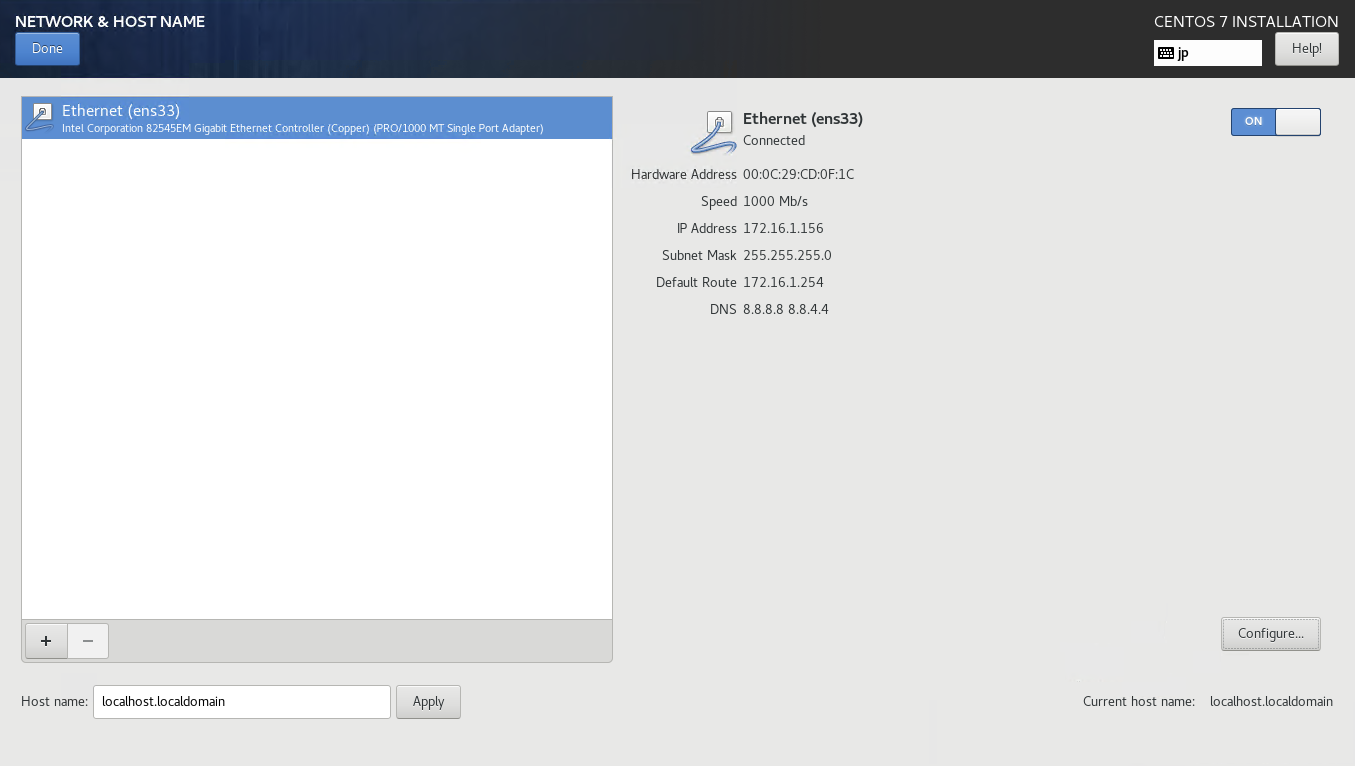
- NETWORK & HOSTNAME
インタフェースがDown(OFF)になっている場合はONにします。DHCP環境であれば、自動的にIPを取得します。再起動時等にIPが変更になるのが嫌な場合はConfigure…をクリックしてIPを固定で設定しておきましょう。また、必要であればホスト名も設定しておいてください。
- Begin Installationをクリックしてインストールを開始します。
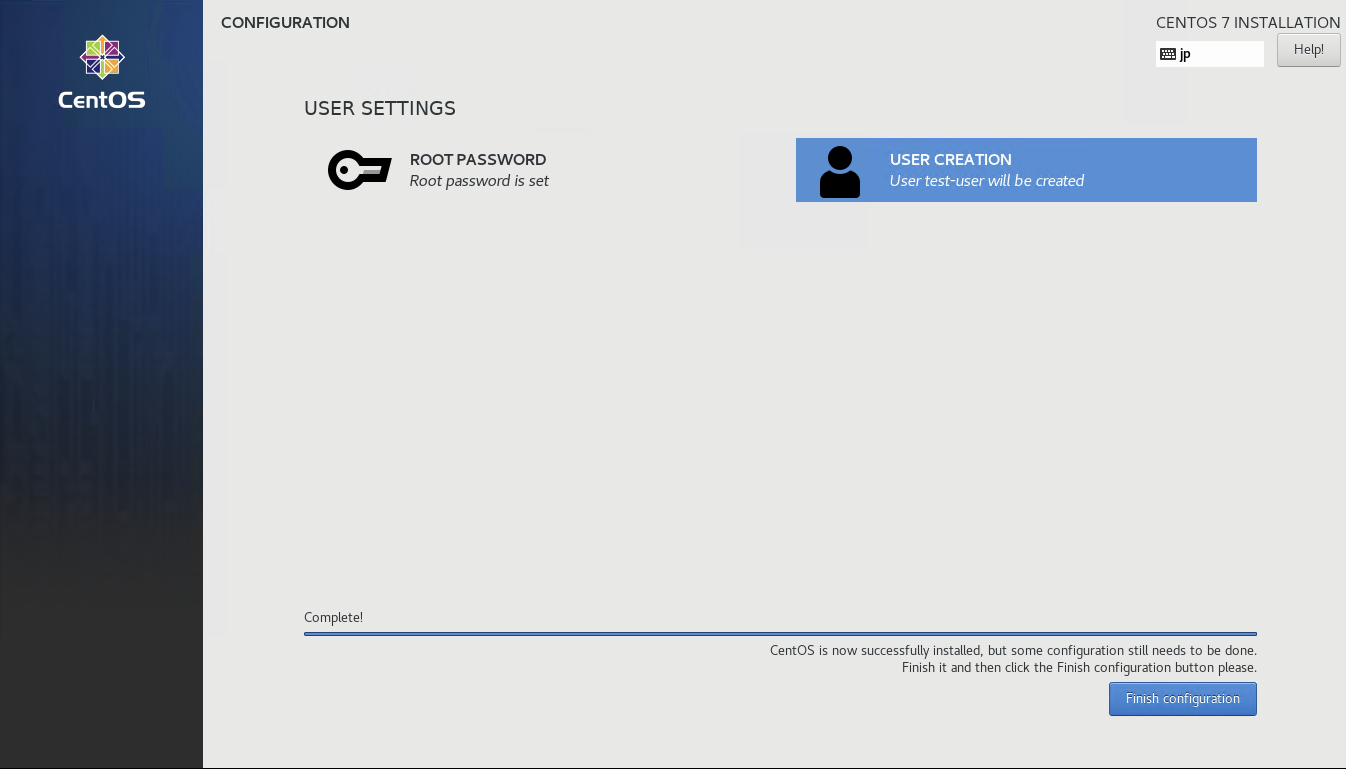
- USER SETTINGS
インストール中にRootパスワードの設定(多分必須)と、作業用ユーザーの作成(任意)を行います。

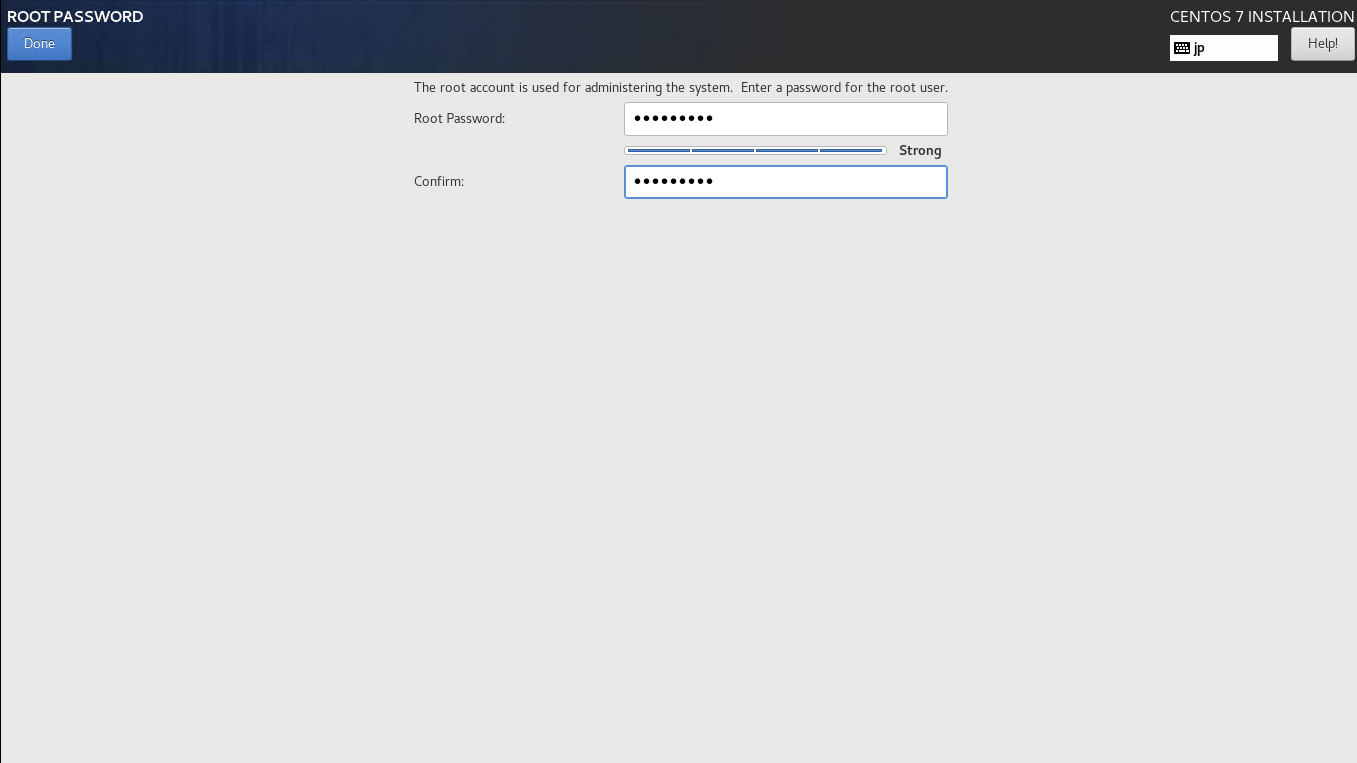
ROOT PASSWORDをクリックして、Rootパスワードを設定します。
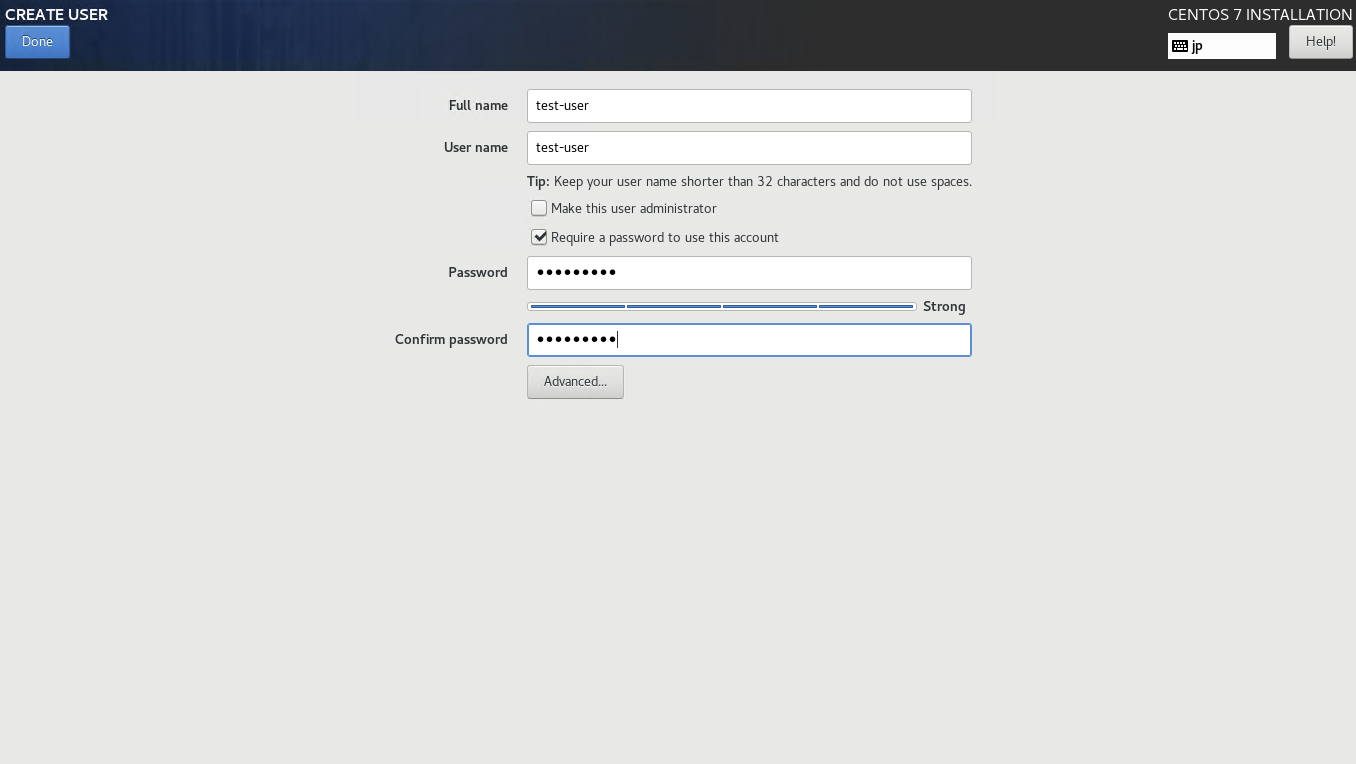
USER CREATIONをクリックして作業用のユーザーを作成します。(任意。今回は使わないかも。)
- Fnish configrationをいうボタンが出てきますのでクリックします。(出てこない場合はしばらく待ってみてください)
- 再起動
Rebootボタンをクリックして再起動してください。これでインストールは完了です。再起動後に、検証環境でのトラブルの原因になるSELinuxとFirewalldを無効化しておきます。 - SELinuxの停止と無効化
rootでsshログインして、作業を行います。
[root@localhost ~]# getenforce      <---- SELinuxの状態確認
Enforcing              <---- 有効

[root@localhost ~]# setenforce 0    <---- SELinuxの無効化
[root@localhost ~]# getenforce       <---- 再度SELinuxの状態確認
Permissive            <---- 無効になっている
この状態では、再起動するとまたSELinuxが有効化されてしまうので、設定ファイルを修正します。
[root@localhost ~]# vi /etc/selinux/config

# This file controls the state of SELinux on the system.
# SELINUX= can take one of these three values:
#     enforcing - SELinux security policy is enforced.
#     permissive - SELinux prints warnings instead of enforcing.
#     disabled - No SELinux policy is loaded.
# SELINUX=enforcing        <---- この行をコメントアウト
SELINUX=disabled             <---- この行を追加
# SELINUXTYPE= can take one of three values:
#     targeted - Targeted processes are protected,
#     minimum - Modification of targeted policy. Only selected processes are protected.
#     mls - Multi Level Security protection.
SELINUXTYPE=targeted- Firewalldの停止と無効化
[root@localhost ~]# systemctl status firewalld           <---- Firewalldの状態確認
● firewalld.service - firewalld - dynamic firewall daemon
   Loaded: loaded (/usr/lib/systemd/system/firewalld.service; enabled; vendor preset: enabled)
   Active: active (running) since 水 2023-01-18 16:43:19 JST; 8h ago        <---- 起動している
     Docs: man:firewalld(1)
 Main PID: 697 (firewalld)
   CGroup: /system.slice/firewalld.service
           └─697 /usr/bin/python2 -Es /usr/sbin/firewalld --nofork --nopid

[root@localhost ~]# systemctl stop firewalld          <---- Firewalldの停止
[root@localhost ~]# systemctl disable firewalld      <---- Firewalld サービスの無効化
Removed symlink /etc/systemd/system/multi-user.target.wants/firewalld.service.
Removed symlink /etc/systemd/system/dbus-org.fedoraproject.FirewallD1.service.

[root@localhost ~]# systemctl status firewalld
● firewalld.service - firewalld - dynamic firewall daemon
   Loaded: loaded (/usr/lib/systemd/system/firewalld.service; disabled; vendor preset: enabled)
   Active: inactive (dead)               <---- 停止
     Docs: man:firewalld(1)
これで再起動してもSELinuxとFirewalldは起動しません。
Dockerのインストール
続いてコンテナ環境を構築します。以下の5行のコマンドでインストールできます。
- まずは必要なコンポーネントをインストールします。
[root@localhost ~]# yum install -y yum-utils device-mapper-persistent-data lvm2- yumでインストールするために、Dockerのリポジトリを登録します。
[root@localhost ~]# yum-config-manager --add-repo https://download.docker.com/linux/centos/docker-ce.repo- Dockerをインストールします。
[root@localhost ~]# yum install -y docker-ce docker-ce-cli containerd.io- Dockerの起動とサービスへの登録を行います。
[root@localhost ~]# systemctl start docker          <---- Dockerの起動
[root@localhost ~]# systemctl enable docker       <---- Dockerをサービスに登録
Created symlink from /etc/systemd/system/multi-user.target.wants/docker.service to /usr/lib/systemd/system/docker.service.- Dockerのバージョン確認
インストールされたDockerのバージョンを確認します。よく見ると、DockerにはClientとServerが存在していることがわかります。
[root@localhost ~]# docker version
Client: Docker Engine - Community <---- Docker Clientのバージョン
Version: 20.10.22
API version: 1.41
Go version: go1.18.9
Git commit: 3a2c30b
Built: Thu Dec 15 22:30:24 2022
OS/Arch: linux/amd64
Context: default
Experimental: true
Server: Docker Engine - Community <---- Docker Server (Docker Engine) のバージョン
Engine:
Version: 20.10.22
API version: 1.41 (minimum version 1.12)
Go version: go1.18.9
Git commit: 42c8b31
Built: Thu Dec 15 22:28:33 2022
OS/Arch: linux/amd64
Experimental: false
containerd:
Version: 1.6.15
GitCommit: 5b842e528e99d4d4c1686467debf2bd4b88ecd86
runc:
Version: 1.1.4
GitCommit: v1.1.4-0-g5fd4c4d
docker-init:
Version: 0.19.0
GitCommit: de40ad0
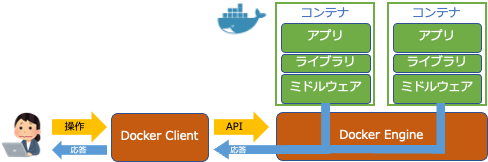
[root@localhost ~]#検証環境等ではクライアントとサーバを同一サーバ上で構築することが多いのであまり気にする必要はありませんが、Dockerはクライアント・サーバ型の構造を取っています。ユーザーはDocker Clientをコマンド入力やGUI操作により操作し、Docker ClientはWeb APIを利用してDocker Engineに指示を出します。そして、Docker EngineはそのAPIに基づいてコンテナプロセスを起動し、その結果をDocker Clientに返します。
今回Docker ClientはCLIを使用して操作しますが、WindowsやMacOS、Linux向けにGUIが利用できるDocker Desktopというアプリケーションも公開されています。
DockerでHello Worldを動かしてみる
Dockerのインストールが完了したのでお約束のHello Worldを試してみます。コンテナでHello World?と思うかもしれませんが、docker container run hello-worldというコマンドを実行すると、内部的にはちゃんとコンテナが作成されています。実際には、以下のような動作が行われます。
- Docker ClientがAPI経由でデーモン(Docker Engine)に”hello-world”というコンテナを起動するように命令します。
- Hello-World用のコンテナイメージを取得します。
→ 今回初回起動のため、コンテナイメージがローカルにないのでDocker HubからPull(DL)します。 - 取得したイメージからコンテナを作成し、メッセージを出力するプログラムを実行します。
- デーモンがメッセージをClientに送信し、それがターミナルに表示されます。
→ Hello from Docker! と表示されます。 - 処理が完了したのでコンテナを終了します。
→ オプションを指定していない場合、コンテナは処理終了後に終了します。
実際の実行結果は以下のようになります。
[root@localhost ~]# docker container run hello-world
Unable to find image 'hello-world:latest' locally                                       <---- ローカルにイメージがないので、
latest: Pulling from library/hello-world                                                       <---- Docker Hubからコンテナイメージをpull(DL)。
2db29710123e: Pull complete
Digest: sha256:aa0cc8055b82dc2509bed2e19b275c8f463506616377219d9642221ab53cf9fe
Status: Downloaded newer image for hello-world:latest

Hello from Docker!                                                                                        <---- Hello from Docker!と表示

This message shows that your installation appears to be working correctly.

To generate this message, Docker took the following steps:                 <---- Dockerの処理概要
 1. The Docker client contacted the Docker daemon.
 2. The Docker daemon pulled the "hello-world" image from the Docker Hub.
    (amd64)
 3. The Docker daemon created a new container from that image which runs the
    executable that produces the output you are currently reading.
 4. The Docker daemon streamed that output to the Docker client, which sent it
    to your terminal.

To try something more ambitious, you can run an Ubuntu container with:
 $ docker run -it ubuntu bash

Share images, automate workflows, and more with a free Docker ID:
 https://hub.docker.com/

For more examples and ideas, visit:
 https://docs.docker.com/get-started/
コメント欄 質問や感想、追加してほしい記事のリクエストをお待ちしてます!